Installation Instructions
Welcome to the installation instructions, follow the guide below to get up and running.
– For hosting a site on the World Wide Web: Verify Installation Requirements and start from step 1.
– For hosting a local “Intranet” or development only site:Start at step 4 and skip steps 5,7 and 8.
Step 1: Obtain a Domain Name
First, you’ll need to come up with a website address, see if its available and obtain it.
- Free custom domain names offer non traditional suffixes such as .TK , .CF, .GA .
- Paid custom domain names offer traditional suffixes as such as .COM, .NET, .ORG, etc .
- We recommend Freenom for free domains and Namecheap or Dynu for the most affordable and convenient paid domain name registrars.
- Search for your desired domain name, sign-up for it and continue onto step 2.
Find a domain starting at $0.88
powered by Namecheap
Step 2: Configure your domain for Dynamic or Static IP Address Service
- If you have a Dynamic IP address, we will direct your domain name to Dynu’s Dynamic DNS service which will then redirect to your changing IP address in step 3.
- If you have a Static IP address, we can simply point your domain directly to your network’s IP address and skip step 3.
- To check if you have a dynamic IP address:
Go to Whats My IP? This is your External IP address, write it down.
Reboot power to your router and check your IP address again.
If its different: You have a Dynamic IP address.
If its the same: You have a Static IP address.
Select your set up:
- Paid Domains with Dynamic IP: Forward your name servers to Dynu's name servers
General instructions:
Every domain name registrar will have an option to manage domain name settings, there, you should find an option to use custom name servers, we will need to forward these to Dynu’s name servers to enable Dynamic DNS.Namecheap Instructions:
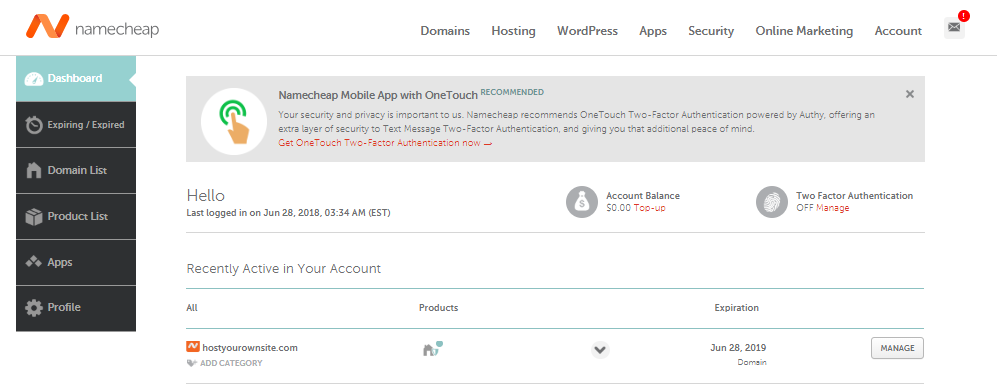
After you’ve purchased your domain and login to your account:- From the Dashboard select Manage.
- The name servers are: NSX.Dynu.com, Where X can be 1 through 6 for US name servers and 7 through 12 for international, you can use one, some or all, this site uses all but number 3. Check Dynu name server locations for more details.

Continue onto Step 3.
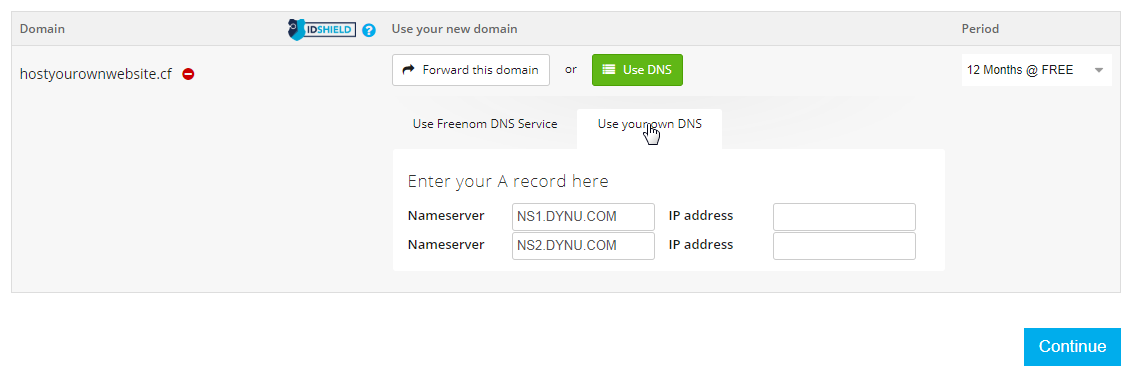
- Freenom Domain with Dynamic IP address: Forward your name servers to Dynu's name serversAfter you’ve selected and your domain name, we will need to point your domain to Dynu’s DDNS server which keeps track of your changing network IP address:
- As soon as you pick your domain name and click continue, you will be able to change the renewal period to 12 Months, select “Use your own DNS”. Enter NS1.DYNU.COM and NS2.DYNU.COM.
- You will then be prompted to sign up for an account and verify your email address.
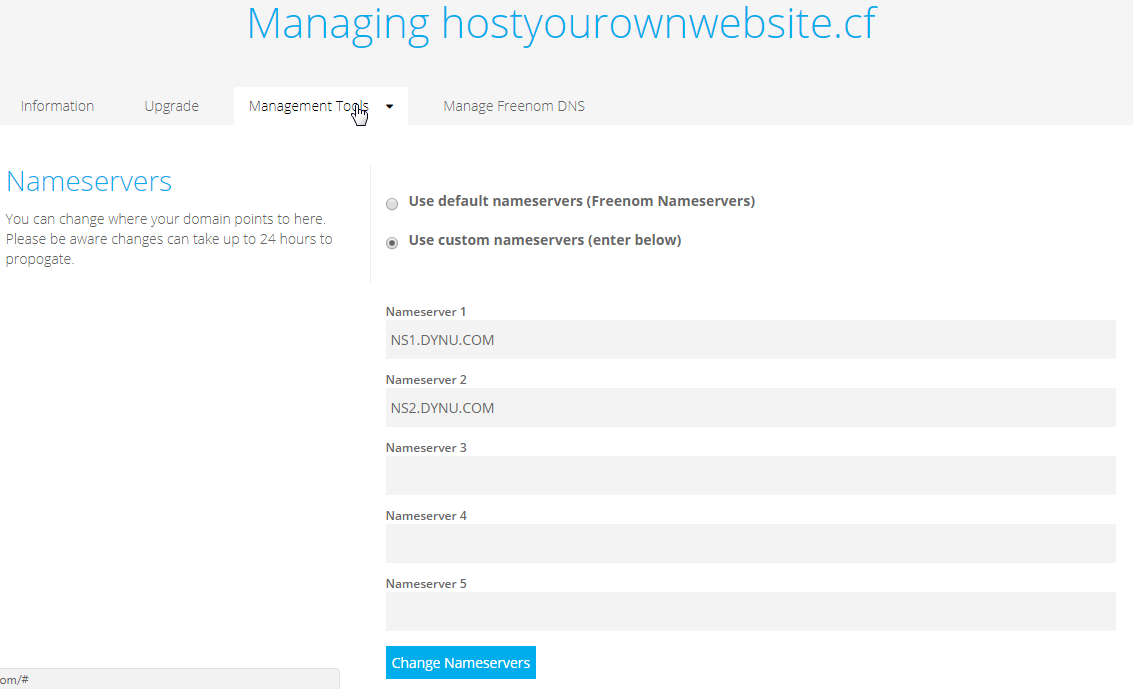
- Once your account is verified, you can log in and under Management Tools > Nameservers, you can add additional Dynu Nameservers.
- The name servers are: NSX.Dynu.com, Where X can be 1 through 6 for US name servers and 7 through 12 for international, you can use one, some or all, this site uses all but number 3. Check Dynu name server locations for more details.
Continue onto Step 3.
- Either Domain with Static IP address: Forward your "A Record" to your IP address
You’ll simply need to add your IP address to the “A record” for your domain name.
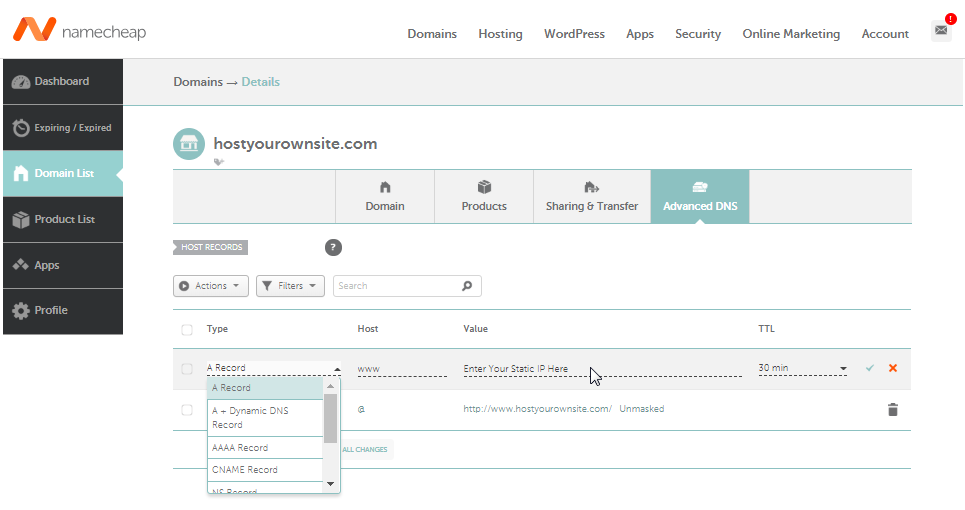
That’s it, skip step 3 and continue to step 4.
Step 3: Setup Dynamic DNS service for your Dynamic IP address
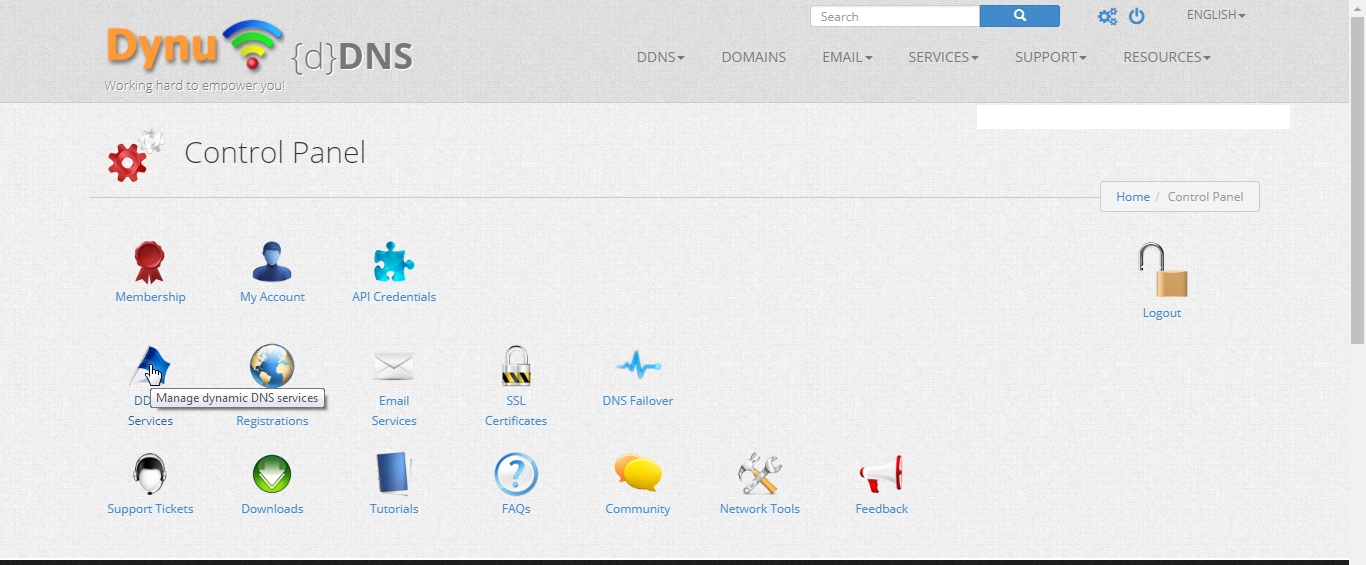
Select + Add for adding your domain.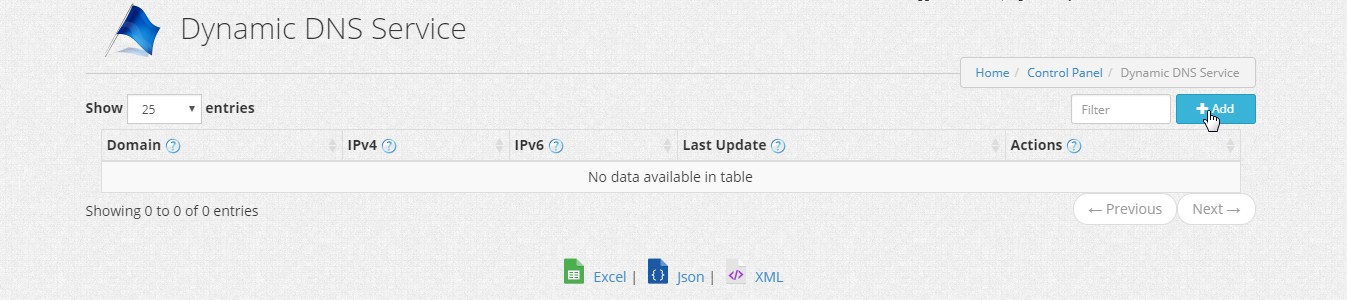
Type in your domain name under option 2 and select Add.
Your domain is now added, you should be able to see it under DDNS service.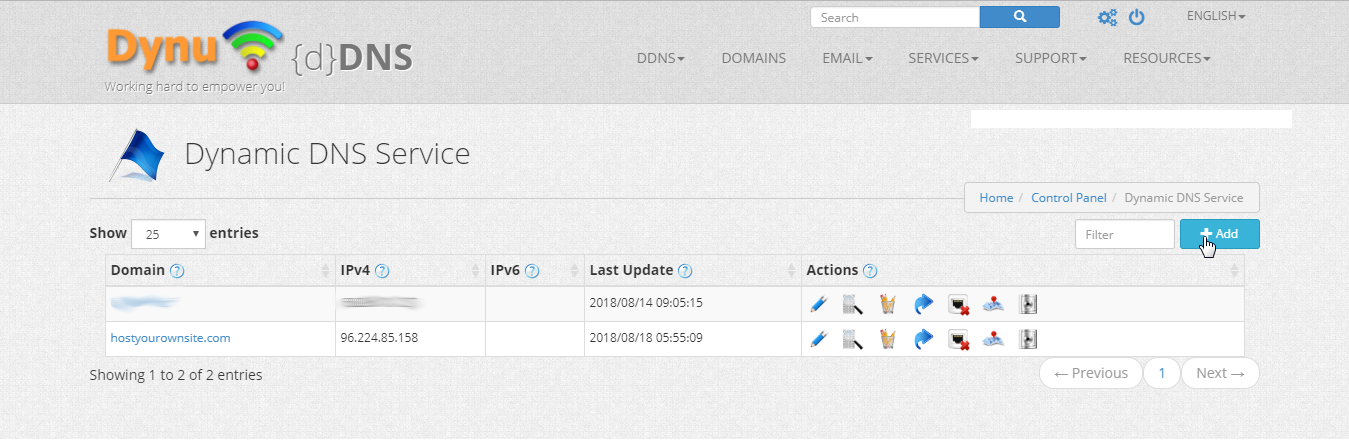
Next, back under the control panel, navigate to My Account and select change password.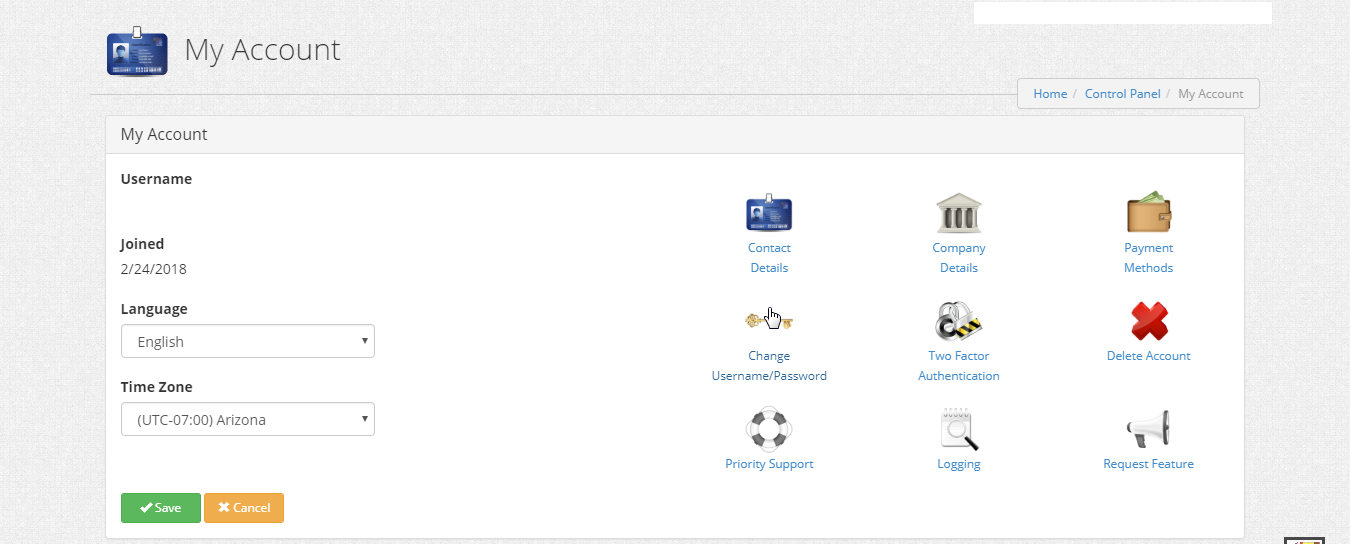
Enter your current password, add a new IP Update Password and click save. Remember this password, you will need it when running the MicroWebPi installer.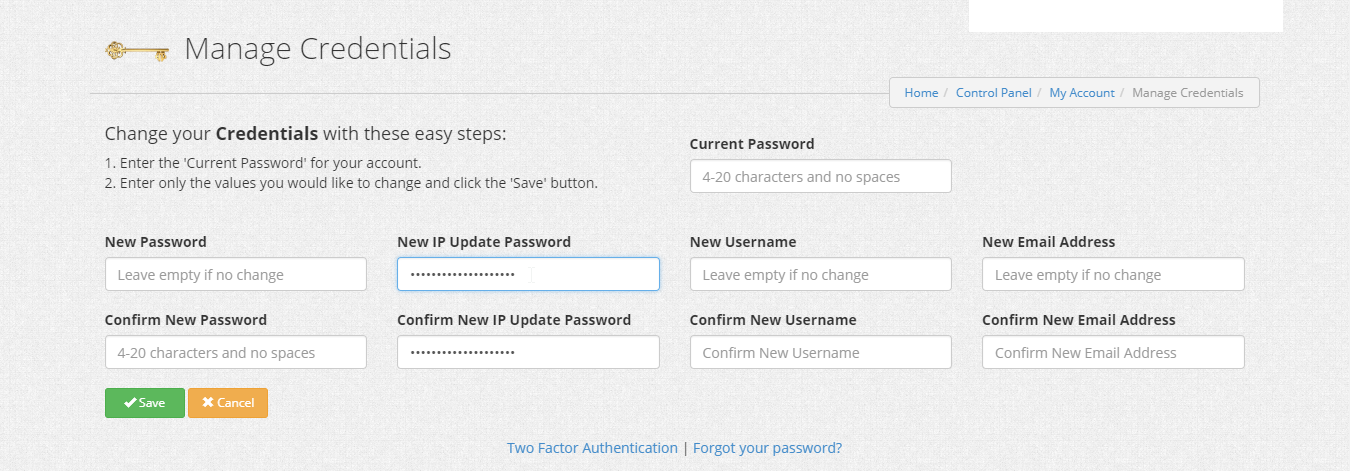
You are now finished with Domain name configurations.
Step 4: Connect your MicroWebPi.
- Plug in an ethernet cable from your router to the MicroWebPi.
- Plug in an HDMI monitor or tv, keyboard, mouse and plug in the power cable.
- If you don't have a monitor/keyboard/mouse you can use another computer or even a phone to remote into your MicroWebPi.
- On your other computer/phone, download the program: VNC Viewer.
- Add your MicroWebPi to the VNC Viewer’s address book by typing in your MicroWebPi’s local IP address.
- You can obtain the Local IP address by referring to step 5.
- Default Username: MWP_User and Default Password: changeme
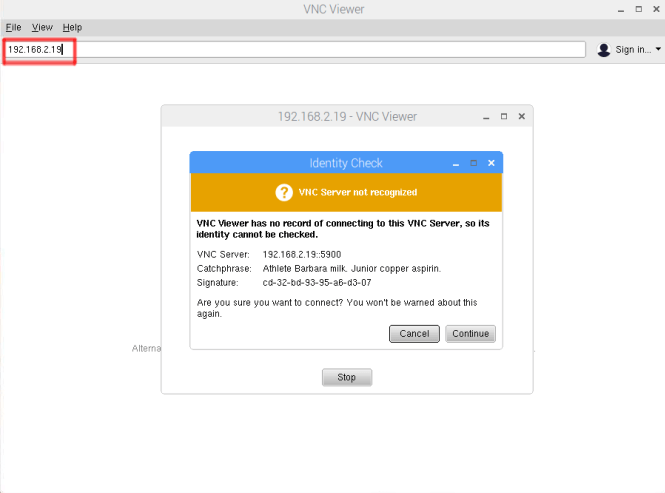
- Select Continue and you will have remote access.
- The MicroWebPi will boot to the desktop.
- Personalize your hostname, change your password and update your localization settings by going to the start menu>preferences>raspberry pi configuration. The MicroWebPi will restart.
Step 5: Configure Router to Forward Port 80 and Port 443.
*Note that every model and brand of router might name its options differently, if you get stuck, please check out our Support Forum, post a question and we will respond.
- From any computer on your network, log into your router’s configuration web page.
- Usually you can reach this by typing in one of the following addresses into a web browser: 192.168.1.1 or 192.168.2.1.
- Look for the address, user name and password on a sticker on your router.
- If you can’t find the login credentials search online for default credentials or check on our forum; common credentials are user: admin, pw: password.
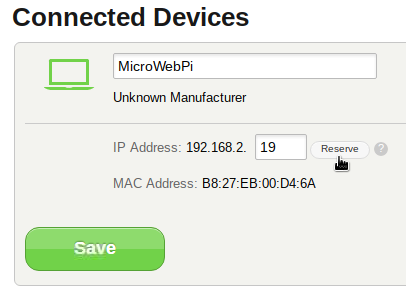
- Routers like ISPs often issue dynamic IP addresses to the devices that connect to their local networks, we will need to stop this for Port Forwarding to be effective.
- Find the list of connected devices and their IP addresses.
- Make note of the MicroWebPi’s assigned IP address.
- If there is an option to lock or reserve that address, do so.
- Some routers do not have a separate setting to reserve static IP addresses but do so automatically for the addresses used in Port Forwarding.
- Find the settings for Port Forwarding, they are often under the advanced, security or firewall settings.
- Forward incoming TCP port 80 to the MicroWebPi’s IP address. This may show up as HTTP service. If it also asks for an outgoing port, select port 80.
- Forward incoming TCP port 443 to the MicroWebPi’s IP address. This may show up as HTTPS service. If it also asks for an outgoing port, select port 443.
- Note various naming conventions: Incoming=Inbound=External=Public and Outgoing=Outbound=Internal=Private=Local

- Continue onto step 6
Step 6 : Run MicroWebPi Installer.
Finally, we are ready to run the website installer.
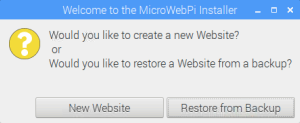
- Run the MicroWebPi’s Installer located on the desktop.
- Select if this is a new installation or a restore of an existing website.
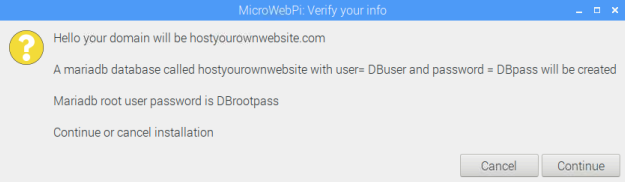
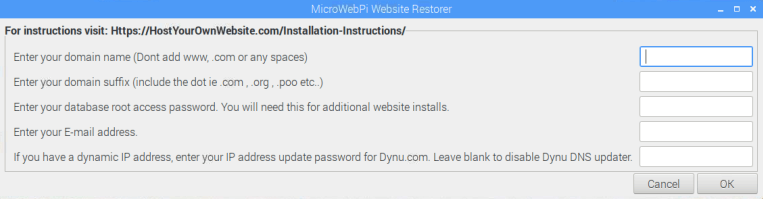
- The following screen will pop up along with a copy of these instructions:
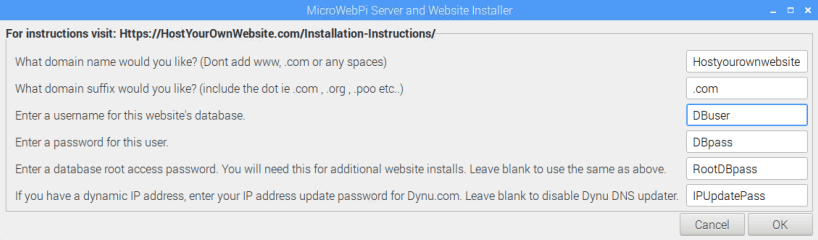
- Enter the domain name and suffix you own.
- Enter a database username and password.
- This password will be used for the creation of the unique database user for this domain. You will only need this to directly edit your database (rare).
- Enter a root user database password, you will need to remember this for any additional website installs.
- Enter your IP update password for Dynu.com or leave blank if you have a static IP address.
- Select OK to continue.
- The Server software has been preinstalled to save you time, if for some reason it is missing it will be detected and reinstalled.
- Your WordPress website will be installed and configured with the server and database.
- Select No if you have previously installed the server software.
- This will install another WordPress website onto the server.
- Verify your information and select Continue to begin the installation.
- After installation is complete your website should automatically open.
- Before you get carried away continue onto the next steps.
Step 7: Verify Site is Live on a Separate Network.
- Use your phone, turn off wifi, and type in your domain name into the address bar.
- If it works, congrats! Your website is live, but your traffic is not encrypted, continue onto Step 8.
- Wait 10 minutes and try again.
- If it still doesn’t work, check out the troubleshooting guide.
- The DDNS updater might not have run or might be improperly configured.
- Open the file manager and navigate to /home/pi/Dynu DNS Renewals/DynuDns, and open the update log. It should read NoChg or Good.
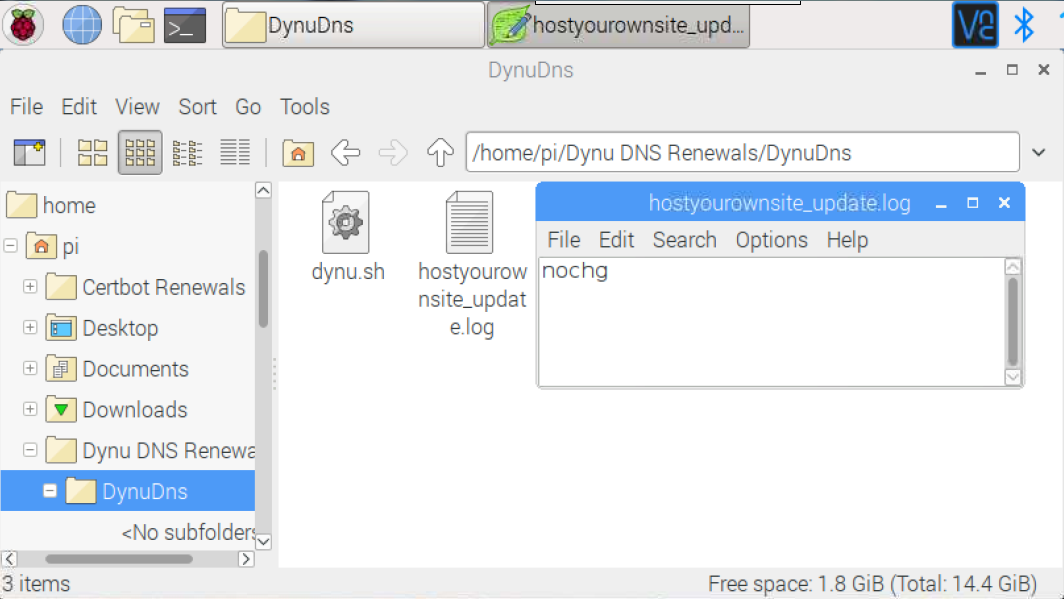
- If it says BadAuth then the password in dynu.sh is incorrect. You can check and change it here:

- Open the file manager and navigate to /home/pi/Dynu DNS Renewals/DynuDns, and open the update log. It should read NoChg or Good.
- Your port forwarding settings might not be correct:
- On your MicroWebPi, go to Canyouseeme.org and check if Port 80 and port 443 are open.
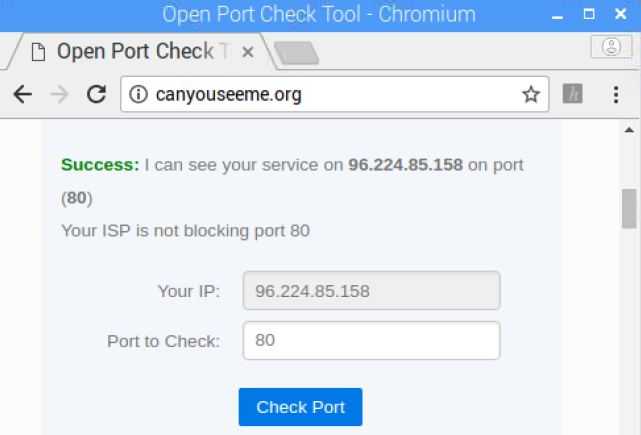
- On your MicroWebPi, go to Canyouseeme.org and check if Port 80 and port 443 are open.
- If the the above fails:
- Check to make sure that the Port Forwarding setting are correct, its possible that the MicroWebPi’s IP address changed if it was not properly reserved.
- Call your ISP and verify that port 80 and port 443 are not blocked.
- If you still have problems check out our forums or email us at Support@HostYouOwnWebsite.com, we will be glad to help.
Step 8: Run SSL certificate installer to Enable HTTPS Encryption.
Once you are able to reach your website from an outside network:
- Click on the Enable SSL launcher and select your domain.
- Once completed, try going to your website again from an outside network.
- If successful you should see a closed Padlock , the word secure and https in your domain name.
- All traffic to and from your website is now encrypted using an SSL certificate from Let’s Encrypt.
- The certificate will automatically renew itself.
Step 9: Your Finished! Customize Your Website and Check out recommended plugins.
Congrats! Your site is live!
This section will serve as a very brief crash course to WordPress.
WordPress has a HUGE community of support so if you have any questions, search online for article or videos, there’s a ton of great information out there.
- Change your Theme
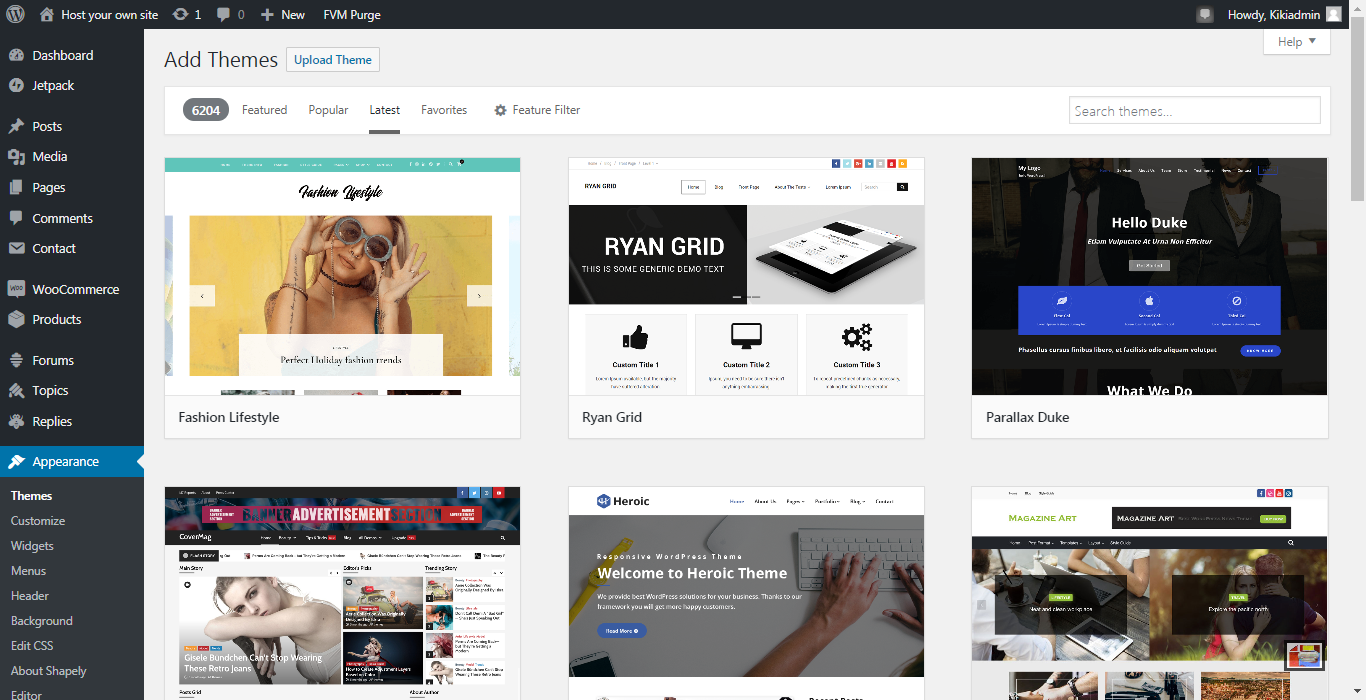
- Under Appearance > Themes , you can select from a variety of different themes to suit your desired style.
- Some themes are free and some are paid.
- Some themes offer demo content on their websites which you can download and then upload so that your theme can look like their examples.
- Check out this site’s theme’s demo content Shapely.
- Upload Media
- You can upload photos, videos and more to your site but a first word of caution:
- Using large files on your website will slow your site down significantly. The average size of a webpage is less than 2 mb, this site’s landing page is 1 mb.
- Don’t use high resolution photos, scale your pictures only to the size you need and use compression- Run your photos through TinyPNG.
- Try not to host video’s directly on your website, instead upload them to a content host such as YouTube and then imbed the video player on your site.
- Don’t forget to add appropriate file names, captions and descriptions, it will help your search rankings.
- You can upload photos, videos and more to your site but a first word of caution:
- Posts and Pages,
- Posts and pages function pretty similarly but have some subtle differences depending on your theme.
- Pages are more meant for content that is permanent and integral to the structure of your site such as, the About me, store front, shopping cart, contact or a restaurant Menu page.
- They often don’t come with a comments section and leave out the time and date a post was created because its not as important.
- Posts are more meant to serve as articles and often include a time, date, author and comments section, this page is a post, but it could have easily been a page.
- Plugins
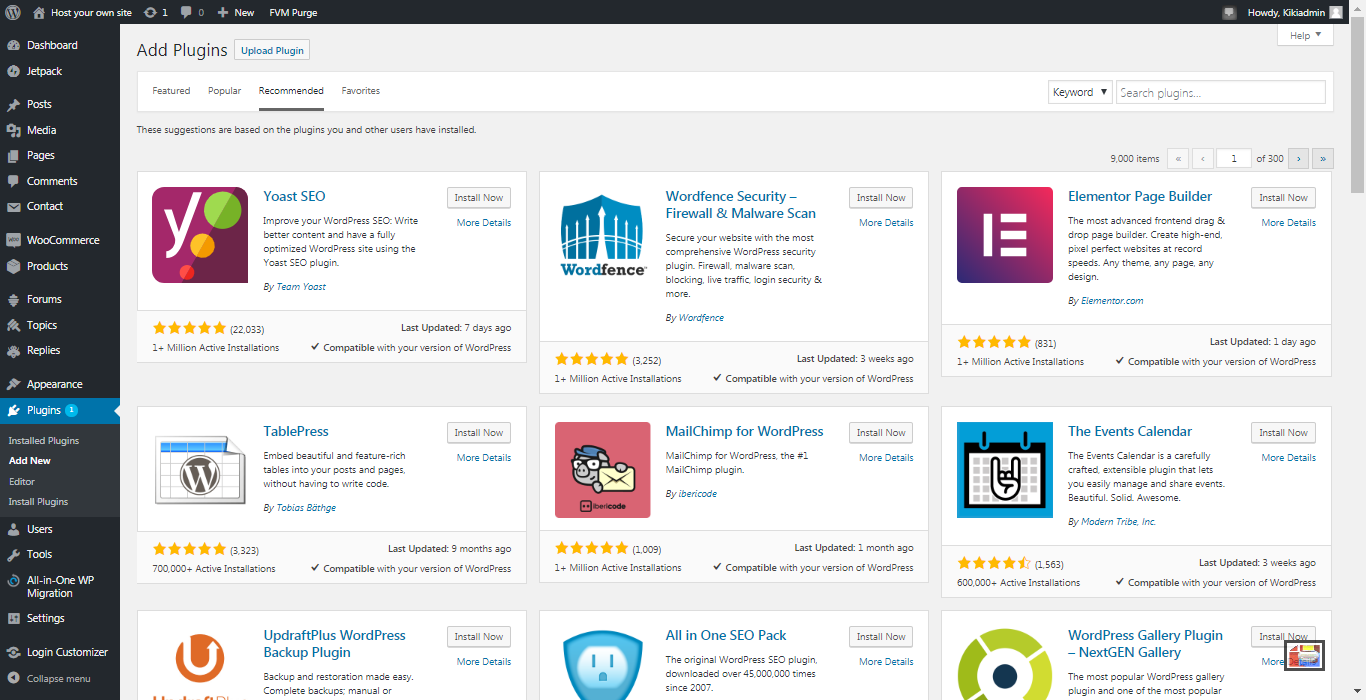
- This is where WordPress give you more control than other website builders.
- If you can think up some added functionality for your site, its likely that someone has already made a plugin for it, some are free and some are paid.
- Be sure to check the reviews as poorly written plugins can negatively affect your site’s functionality.
- We recommend
- Fast Velocity Minify, for reducing http requests and speeding up your site (preinstalled).
- WP Mail SMTP, So that WordPress can send mail using your email accounts (preinstalled).
- Nginx cache sniper, for clearing your cache when updates are made (preinstalled).
- WooCommerce, for a well supported eCommerce site.
- Jetpack, for site downtime monitoring, statistics and more.
- All-In-One WP migration, for backing up your site or moving it to another server.
- Want a drag and drop experience? Checkout Elementor or Page-builder.
- WP Super Cache, for further caching content and speeding up your site.
- We recommend
That is it, have fun!
Step 10: Configure Additional features: Automatic Website Backups, Website down monitor, etc...
- Automatic Website Backups
After your website is installed it will automatically be scheduled for backups every night, with only the last 2 days of backups being stored.
You can find these backups in the MicroWebPi/Backup/YourWebsite_Archived_Backups Folder.It is highly recommended that you change the save location for your backups to an external device like a flash drive or hard drive.
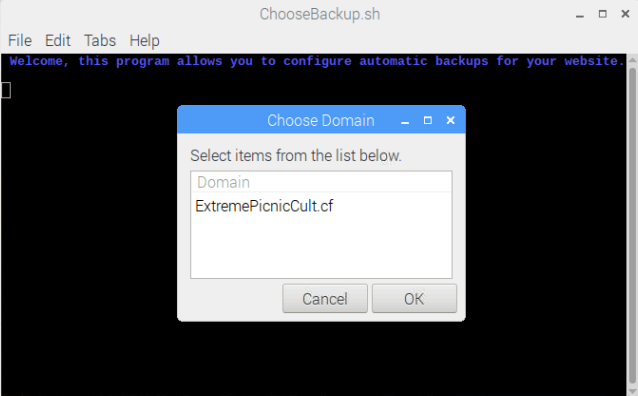
You can change the save location, backup frequency and number of backups by clicking the Backup Websites Utility on your Desktop.

First Select the Website you would like to backup.
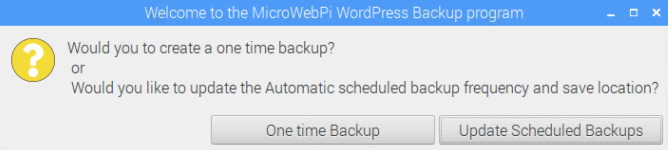
You can select to create a one time backup but for this example we are going to select Update Scheduled Backups.
Next select your desired automatic backup frequency and the maximum number of saved backups.
You can select to have the backups performed from every 1-31 days, backups will be performed during the night from 1:00 am -3:00 am.
Enter 0 to stop automatic backups for this site.
Be sure to be mindful of your available disk size when selecting the maximum number of saved backups.

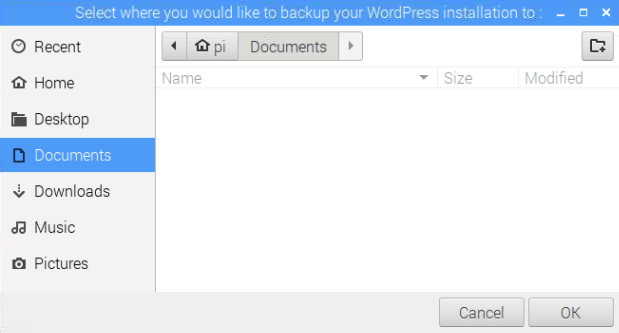
Next select your desired storage location, it is highly recommended to select an external device such as a flash drive or external hard drive so that if the internal storage device fails, all will not be lost.
Your backup consists of your WordPress root folder (named after your domain), the SQL database and the NGINX virtual host configuration. They are all compressed in a zip file for efficiency.
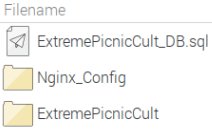
You can later run the MicroWebPi Installer and select the Restore option to restore your backup.
Enter the information below and later select your backed-up WordPress root folder and database file to restore your website.
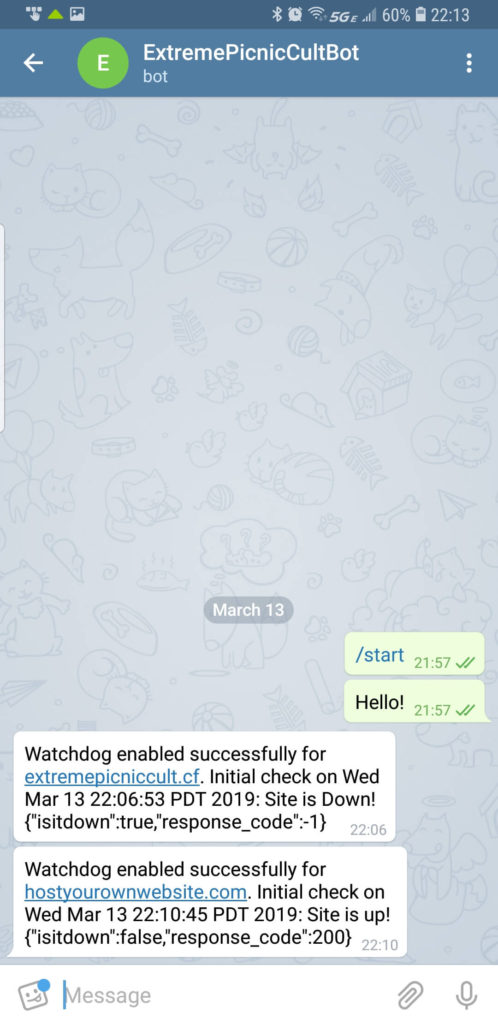
- Telegram Website Down Watchdog with Fallback ProtectionThe Website Down Watchdog will monitor any website and send you a message via the Telegram App if the website goes down.
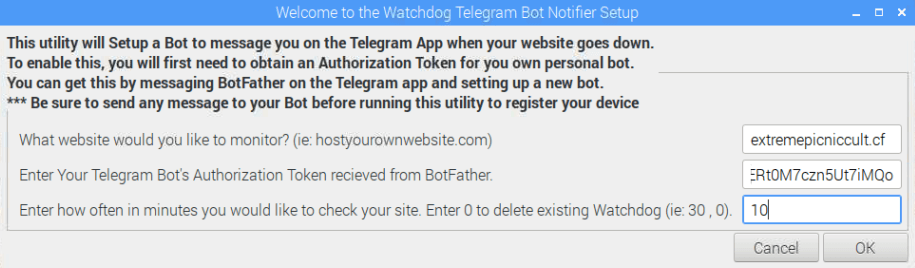
The Fallback protection option will allow a secondary MicroWebPi to take over as the main server if it detects that the main server is down.Click on the Enable Watchdog Icon on the Desktop to begin.

To create your Bot we will need just 3 pieces of information: The website you want to monitor, your Telegram Watchdog Bot Authorization Token and how often you want the website to be checked. We will obtain the Authorization Token in the following steps.
First, download the Telegram messaging app on your phone. We are going to create a Bot that will message us when our site is down.
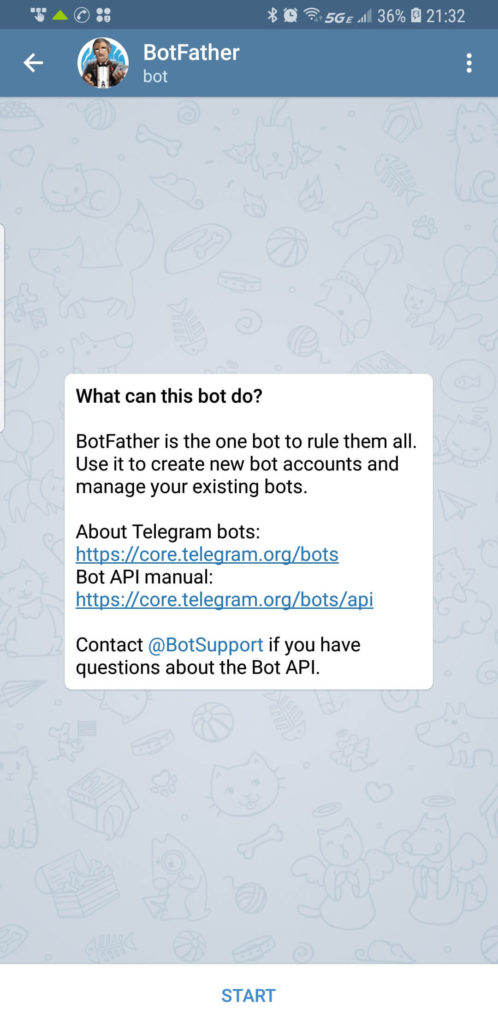
Open the Telegram app, create your own personal account if you don’t already have one and then search for BotFather.
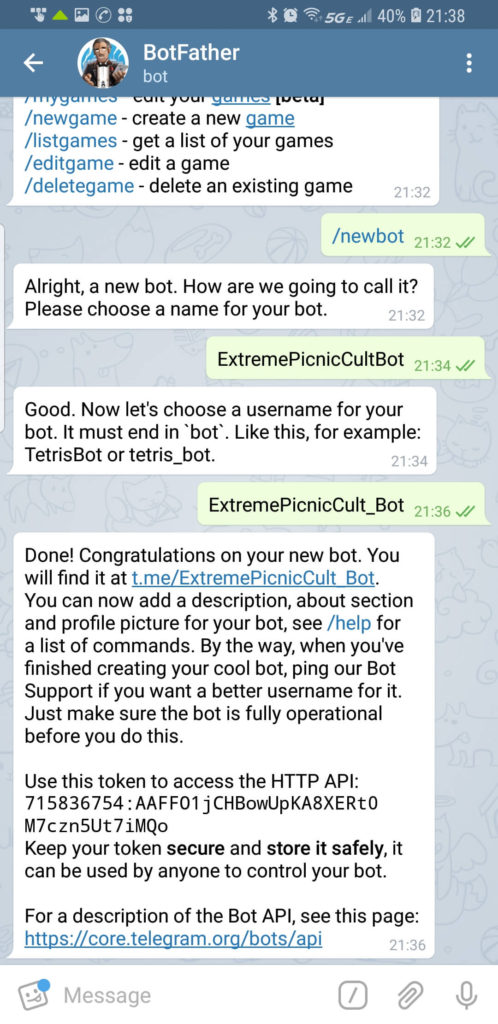
Send BotFather “/newbot” to create a new bot.
Then enter the desired name of your new bot.
Then enter a username for your new bot (must end in bot)
Boom! Bot Father will give you the authorization token for your new bot copy this but don’t enter it into the installer yet.
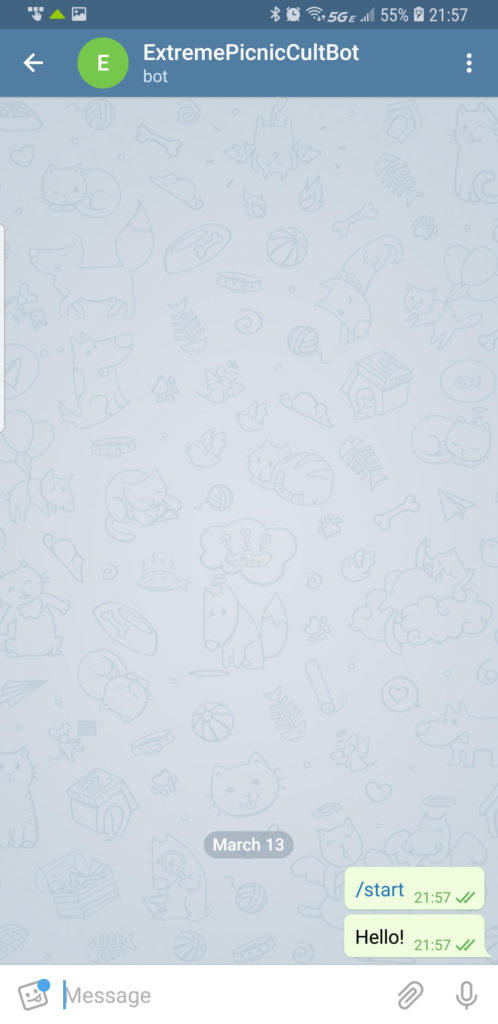
Before you enter the authorization token into the Enable Watchdog Utility, we first need to search for your new bot and send it a message from your phone. You can send any message, in the example below “Hello!” was used, this will let your new bot know who to send update messages to.

Now you can run the Enable Watchdog utility on your MicroWebPi and enter the authorization token.
You will then be asked if you want to enable Fallback protection. This is typically used if you want to provide redundancy to your MicroWebPi by having a 2nd MicroWebPi located somewhere else. It requires you to have DYNU DDNS updating enabled. The secondary MicroWebPi monitors your site and when it detects that it is down it will redirect traffic to itself by updating DYNU’s DDNS Service.

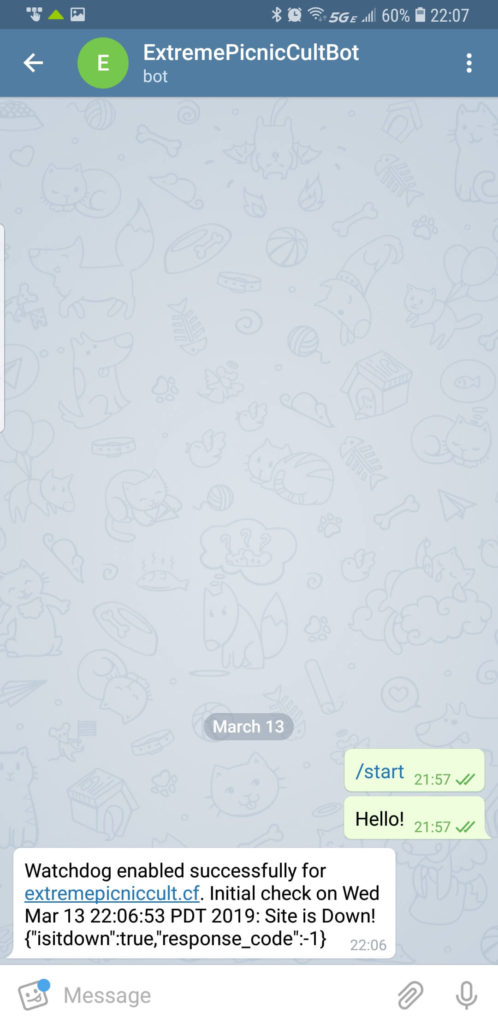
If everything goes well, then you should receive an initial message from your Bot saying that Watchdog Configuration was successful.
You can repeat the process using the same Authentication Token for additional Websites, just don’t forget to send your bot a message before running the Enable Watchdog utility.
- Add File to WebrootThis Utility is used to add files to your websites root location.
This is often used for 3rd party services that require domain verification

Its as simple as selecting the domain you would like to add the file to and then selecting the file you want to upload. In the example below we will add a file named “ImAddingThisFileToTheWebroot.html” to the domain “ExtremePicnicCult.cf”.
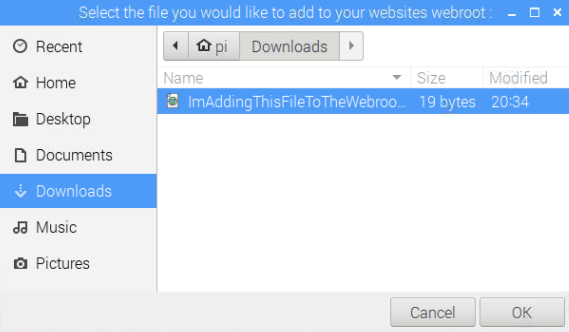
After you add the file to the webroot you can verify that it is there by going to its address: “ExtremePicnicCult.cf/ImAddingThisFileToTheWebroot.html” and if it is successful, you should see the contents of the file on your web browser.

2 COMMENTS
I AM INTERESTED! but I got some questions
I am assuming is a full LEMP how far I can go with this web server? for example, can I handle a peak of 50,000 pageviews per month? Is not the case of my site but I am thinking in a tech news portal and I want to plan myself for that
a) Which Linux version are you installing? Is it a version that you have customized?
b) Can I put a 128 GB card? before beginning the installation
c) Can I upgrade WordPress and so on?
d) Is there any Firewall embedded? or should I have to rely on Wordfence for protection?
e) Caching? Can we put something like Varnish or is too much?
f) Does this device overheat? and get on fire?
g) Can I install something else like Mautic? http://www.mautic.net considering it has some OS package requirements
Cheers
JF
Hey Juan,
Thanks for the interest and questions.
It would be able to handle 50,000 page views a month if they were evenly distributed, check out https://hostyourownwebsite.com/comparisons-and-benchmarks/ for stress testing results. This site was served 422 times in 123 seconds.
a) Its a customized version of Debian known as Raspbian, specialized for this hardware.
b) Yea you can use a 128 GB card if you’d like: there’s an option to clone the existing micro-sd card over to a larger card.
c) Yes of course, you can upgrade WordPress and plugins etc.
d) The server configuration should prevent hackers from reaching other parts of the system, however there is no monitoring of your WordPress files.
You can use Wordfence if you like.
e) No need for Varnish, it is already configured for RAM based caching through NGINX, this should be as fast as it gets for this setup.
f) Haha, It was designed to run without a heatsink or fan, but for overkill additional heatsinks and a fan were added. I have never had an issue with overheating.
g) Looking at Mautics’s requirements, it seems like it should be able to be installed however I have not personally tested it.